Lead Generation
16/2/2025
Google Merchant Center is essential for those who want to present their products on Google Shopping. Here is the ultimate guide to getting it all figured out!

Google Merchant Center is essential for those who want to present their products on Google Shopping. This platform offers the ability to import items from your store, monitor the quality of the product feed, link your account to other platforms, and much more.
Poor implementation of features in Merchant Center can affect the effectiveness of Google Shopping campaigns. So here is a Google Merchant Center guide to fully understand how it works. Let's go!
Since 2010, Google Merchant Center has offered a platform that allows you to easily integrate products from your e-commerce site directly into google.
There are several reasons why importing your product feeds into Google Merchant Center can be beneficial:
In short, the benefits of using Google Merchant Center are multiple. You would be wrong not to go for it!
The first step in understanding Google Merchant Center is to know its interface.
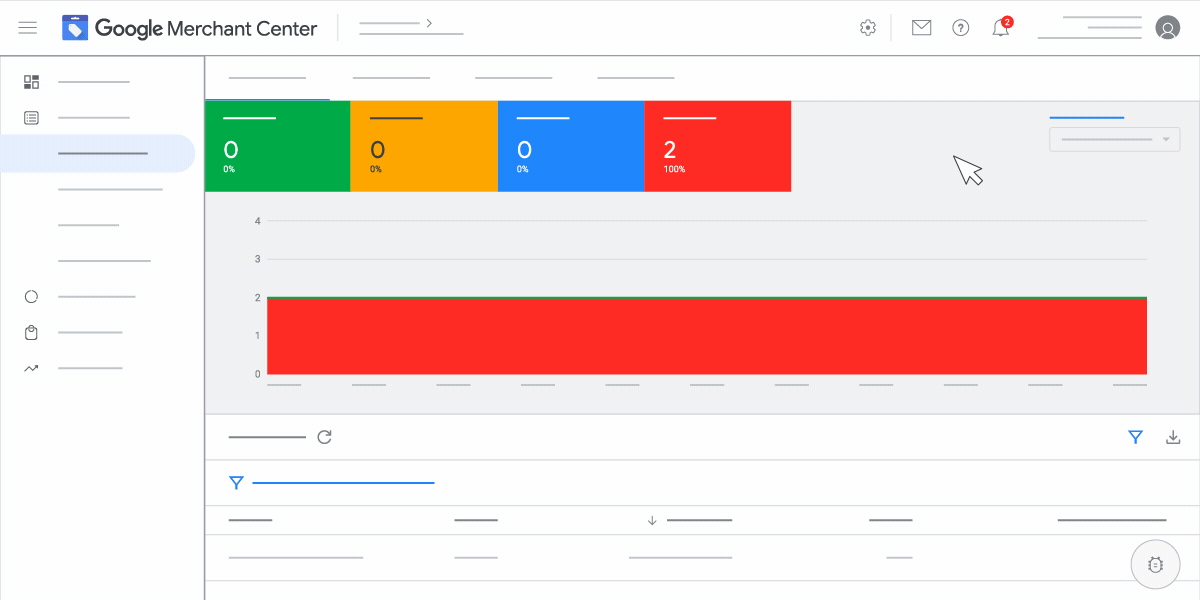
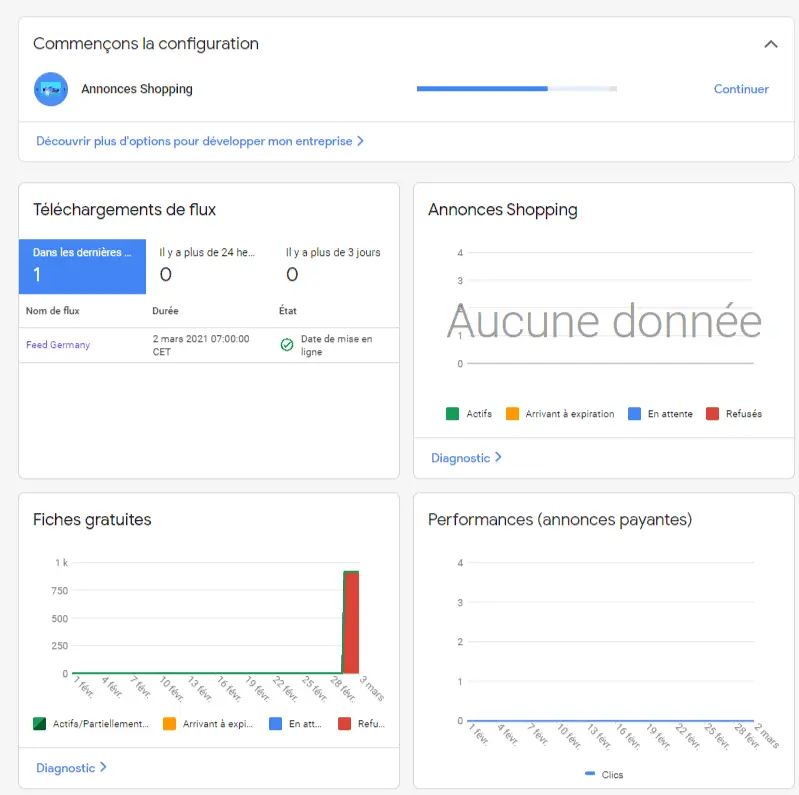
This section offers a summary overview of the key elements of your account: the import of your feeds, the status of your free sheets, as well as the performance of your product sheets (number of clicks, impressions, etc.).
Use this dashboard to identify and resolve potential issues.
In this section, you can integrate products directly into Google Merchant Center.

Via a dashboard, Google allows you to evaluate the performance of your product sheets according to the number of clicks, impressions and the click rate.
You have at your disposal an effective tool to create tailor-made reports. You can review your data and analyze specific aspects such as the total number of orders placed, items purchased, or the total number of clicks.

This section only becomes visible after the first feed has been added to your account. From this interface, you can create a promotion for your product sheets.

Under the “opportunities” section, Google provides you with analyses and recommendations to optimize the performance of your product sheets.
However, to receive these suggestions from Google, prior activity on your account is required, covering at least several days of history.

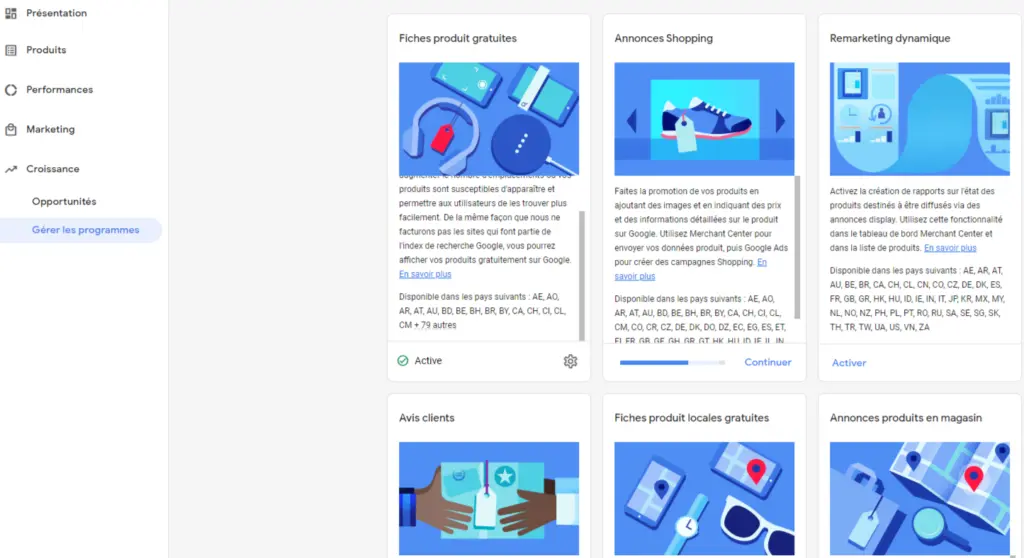
Another option available to you is “Manage Programs.” In this section, you will find all the features that are ready to be activated (such as customer reviews or remarketing) or that require configuration (such as product comments, shopping ads, etc.).
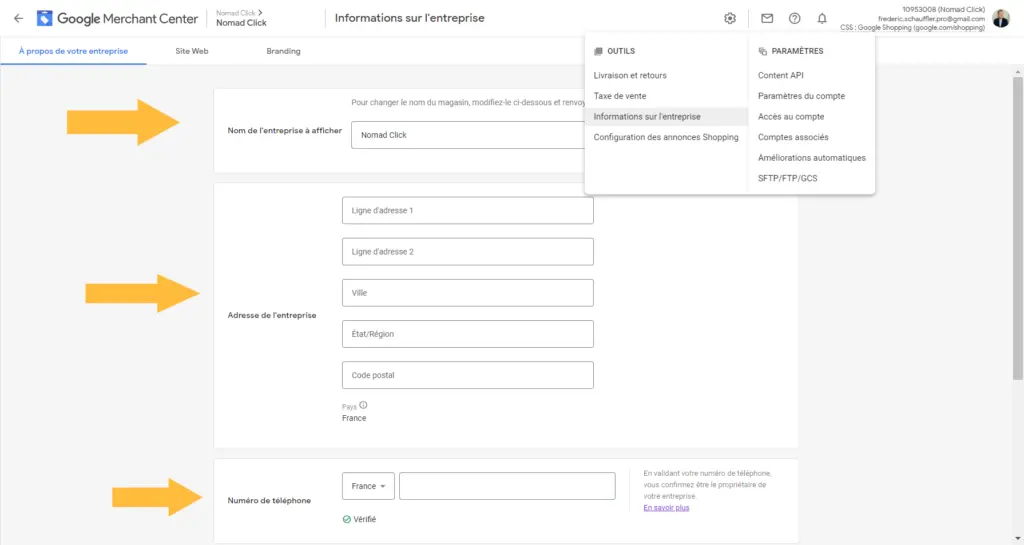
Head to the menu and select “Business Information” located under the “Tools” section.
A new window will appear with three tabs:
It is the first tab that is relevant here. In this section, company information will be configured.
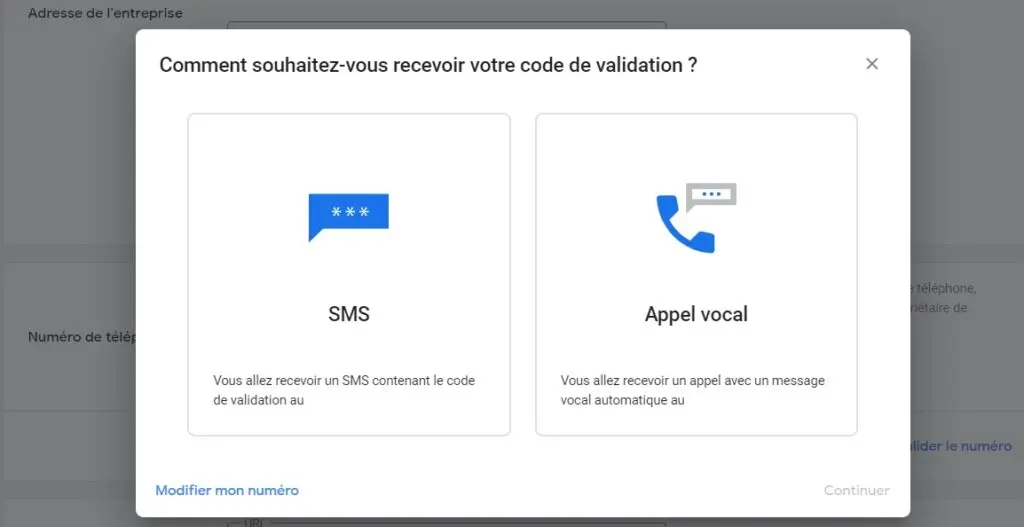
Opt for one of the two methods proposed to obtain the validation code:
A code will be sent to you. Enter this code in Merchant Center and click “Finish.”
The next step is to validate and claim your website via Google Merchant Center. This confirms that you own the rights to the website you want to promote. This step is only required once.
To proceed:
Here are 4 methods to validate your website:
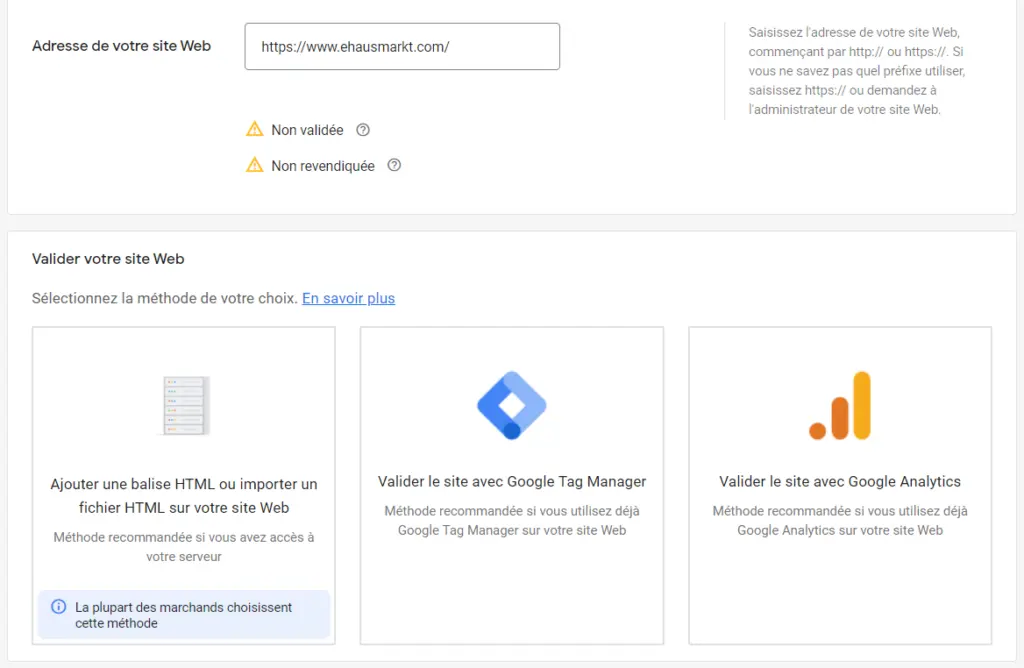
Once you have chosen your method, press “Validate Website” located at the bottom right to submit your site for validation.
If your site has already been validated on Google Ads with the same Gmail address, you can directly validate it by simply entering the URL and clicking on “Continue”.
Then, it is essential to claim your website in order to have the exclusive right to associate the site with your Merchant Center account. Press “Claim a website” located at the bottom right.
Delivery settings should definitely be set in Merchant Center. Thankfully, the setup process is straightforward.
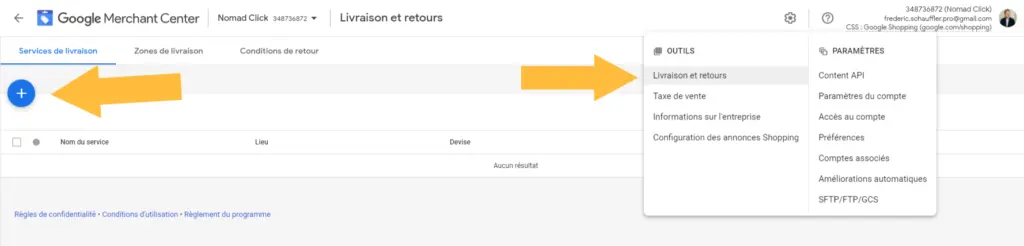
Start by selecting “Delivery and Returns” located in the “Tool” section of the menu. For optimal account settings, setting up a delivery service is essential. It is recommended to click on the blue button marked with + to start the configuration.
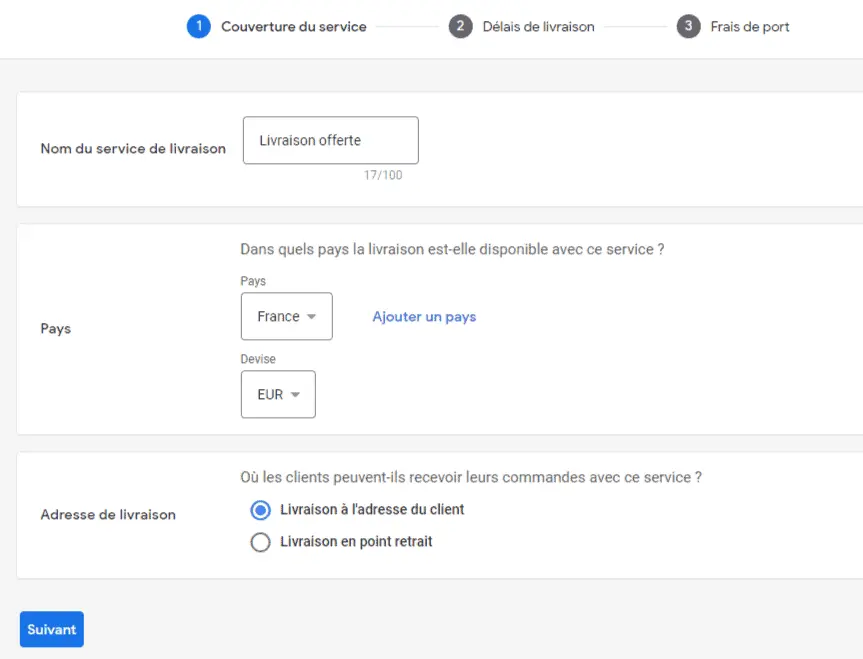
In the “Service coverage” section, it is necessary to assign a name to your delivery service. For example, for a free delivery service on French territory, you could name it “Free home delivery — France”.
After naming the service, choose the country of delivery and specify the delivery location (at the customer's home or at a relay point). Finally, click “Next” to move forward.
It is important to have current information on your delivery times. For those starting a new business, it would be a good idea to consult their logistics partner in order to obtain time estimates. It is advisable to fill in all the fields indicated carefully:
In the third step, choose the option that best reflects how delivery charges will be applied to the customer.
There are 4 options to consider:
After choosing the appropriate option, press “Save” to finalize the setup.
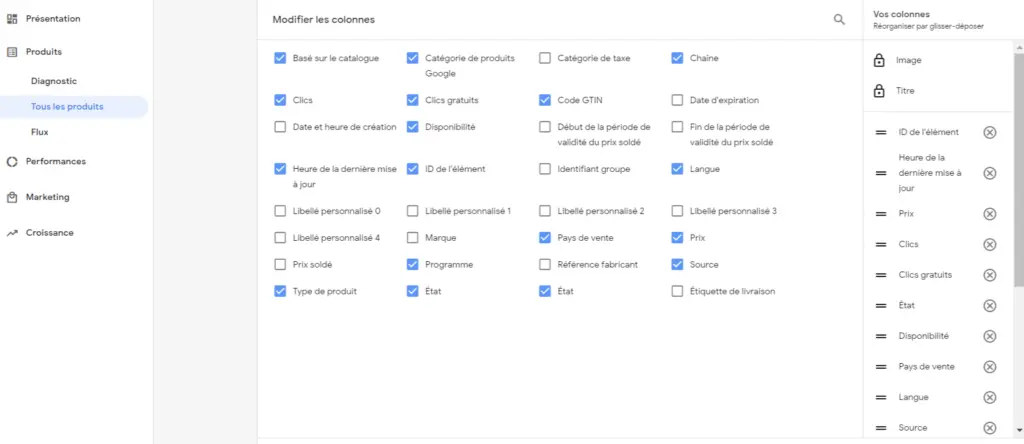
There are several ways to integrate products into Google Merchant Center. Either you introduce a product individually or you import product feeds in bulk.
To integrate a product manually, select “Add a product” in the “Product” tab in the Google Merchant Center interface. A page appears where it is necessary to fill in all the fields relating to your product.

For quick product integration, you can opt for product feeds.
A feed is essentially a file listing the products you want to promote via Merchant Center. Each product you integrate requires specific attributes. These feeds use these attributes to classify your products.
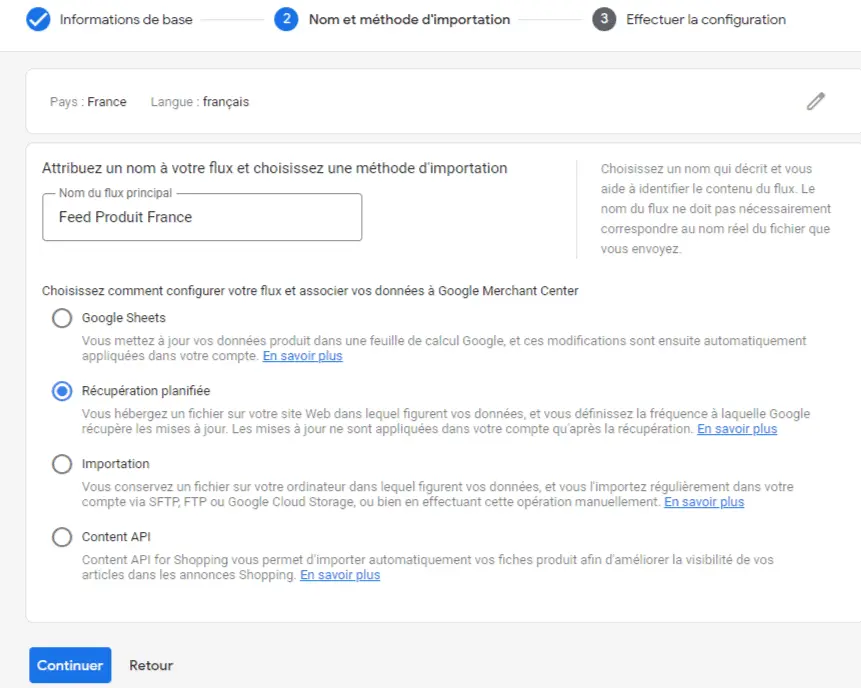
Once you've established a flow, it's reusable for whatever Merchant Center functions you want.
To get started, go to “Flow” in the “Products” tab. Then press the “Plus” button.
Once your products have been successfully integrated and approved in Merchant Center, it's critical to continue setting up the account.
To make full use of your product information on Google Shopping, it is necessary to establish a link between your Google Ads account and Google Merchant Center.
Only a Merchant Center user can initiate this association.
A Merchant Center account can be linked to up to 100 Google Ads accounts. Once the Google Ads account owner validates this link, information is exchanged between the two accounts.
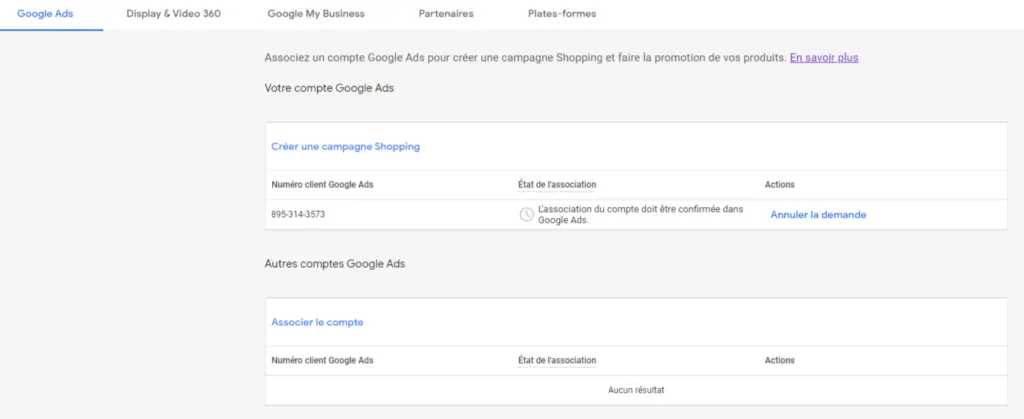
Merchant Center product data is then available in Google Ads to develop campaigns. Additionally, some metrics of Google Ads, such as the number of clicks, will be visible in the associated Merchant Center account.
However, if the link is broken, Shopping campaigns that rely on Merchant Center account data will stop showing ads. In addition, the creation of new Google Ads campaigns based on this data will no longer be possible.
Once you have followed all the steps in this Google Merchant Center guide, you can launch Google Shopping campaigns to promote your products on Google.
Long-term management of these campaigns is the next step. Here, it is advisable to regularly monitor Google Merchant Center account activity when deploying Google Shopping campaigns.
The platform in fact makes it possible to control the quality of the product flow, an element that can directly affect the costs per click of your poorly managed campaigns! It's up to you to play!
3 Boulevard de Sebastopol, 75001, Paris
©Copyright 2024. All rights reserved.
If you want to keep in touch, and get a summary of Growth Marketing every week, it's just happening here 👇